draw what you see

drawing a pencil with a pencil...have YOU tried that???


"drawing
is like
taking
a line
for
a
walk..." (klee).


Art is how you feel, what you touch, what touches you.

colors, lines, shapes.

eyes, hands.

you.
you are the art.


We offered the idea of Still Life art with our 4s and 5s. This process is something that works well after a length of time in your classroom (months even) where children have had extended choice time with art materials, exploring, inventing, using Stuff, using Stuff again and again, discovering a sense of being an artist.

The idea of Still Life can be really fun for children. We talked about how art is YOUR CHOICE and WHAT YOU SEE. We talked about how in Still Life artists often try to represent what something really looks like, exactly, yet  - ironically - the art work always depends on YOU, The Artist, and how YOU see something.

We talked about
  • details
  • looking again and again
  • color
  • shape
  • curves and line
  • size and spatial sense
  • going slow so your eye and your hand can work like a team !

In our First Work the children chose anything in the classroom for their Still Life drawing. This is a wonderful way of engaging children because - no surprise - they will be more connected to their work when they have choice and ownership. The choices of items themselves were a delight to see - who would have known that someone wanted to try to draw a cell phone? a dinosaur skeleton? blocks stacked just so? or a pair of Fiskar scissors?

**[my apologies for the less-than-fabulous photos as these are photos of photos...I think they still offer a strong sense of the quality of the children's efforts].


The second experience with Still Life was outside among our big trees and flowering hills of our school yard. The children used clipboards, chose whatever they wanted to draw, sat where they chose to sit to observe their "still life" and dove into their work.

Outside with clipboards...trees, flowers, drawing close-up and drawing far away...


The third experience with Still Life was with a classic vase of flowers. These were challenging and beautiful! We presented the group with the same item - the vase of flowers -  yet their different perspectives allowed each art work to be as though they had their own vase.


"Drawing is like taking a line for a walk..."(and who doesn't enjoy a lovely walk?)

Go. Take a walk with your children:
Draw what you see.


this is me: self portraits

child's details: nose and lips shapes, teeth, eyebrows, skin and hair blended colors, one barrette.
Oh. Self portraits.
Many schools require students to do self portraits a few times during the school year to place into their portfolio as evidence of small motor, facial details, hand-eye coordination, perspective, spatial sense. While this is wonderful on a certain level, it is more so a requirement (and often assessed or graded) and not so much an extended exploration.

Many other schools offer the idea of portraits to children from another lens.
Teachers might offer portrait making for students as a way for them to see themselves from another angle, reflected in a mirror, to try to SEE one's self and then represent it on paper. It is an art process and also quite a personal process as there is absolutely no right way to represent one's self - one's face.

It is a treasure to offer the experience to children and for them to engage with the materials, the mirror and their own face for the length of time they choose to do so.
pencil and mirror ready: look up, then draw, then look up again, then draw...
this boy had such fun with his portrait: his hair that day was quite fantastic and he made sure to capture it!
the nose is one of the most challenges shapes to draw. this child used a triangle shape then used circles for eyes.


Ways to introduce the exploration of self portrait:
  • MEETING: before getting to the art tables, handle the mirrors to explore what we SEE.
  • INTRO NEW LANGUAGE: long/short hair, dark/light hair, dark/light skin, eye shape and color and eyelashes, nose shape (this is a big challenge and usually an interesting discussion !), mouth and lip shape (also an interesting discussion), ears (do you see yours?), etc.
  • INTRO how to DRAW WHAT YOU SEE by GOING SLOW so YOUR HAND and YOUR EYE can work together.
  • IF you do not have mirrors, you can offer a color photograph of the child's face.
  • Younger children (2-3), the representation might be a large shape or lines for the head, and some lines or markings inside the shape or around for possibly eyes or a nose. Hair is sometimes fascinating for younger children to try to draw as it is often lines that can curl or curve or go on & on.
  • Working with 4s and 5s and older, the representation will likely have a few more concrete shapes and images that are in close proximity to where they truly are on their face. 
  • THERE IS NO RIGHT WAY to tackle self portraits. It can depend on your children, their prior experience using art mediums and their interest or ability to stay engaged.
  • YOU MIGHT CHOOSE crayons, pastels, chalk, charcoal, pen, watercolor...depends on the children and your available art mediums.
  • YOU MIGHT CHOOSE to have a table available for portraits for days and days, not just as a small group experience on a specific day.


These 5-year-olds were part of an art class where we voted on different things to try each week.


Their portraits took a few visits for their sketch details and then the watercolor layer.


The completed portraits were so stunning.
The children's personalities were evident in each one.


This is me.


This is me.


THIS IS 
ME.


hungry caterpillar felt story

I was inspired by NurtureStore's The Very Hungry Caterpillar activities and wanted to offer one more to help celebrate the work of the incredible Eric Carle.

[ *I should note that this post is unusual in that it presents "my work" that I created to add to the children's hands-on choices in the classroom. There is always - always - room to adjust the example for children to be the inventors of these characters or others, in felt or paper, as puppets, on sticks, whatever works for your child or children :) ]


You can write the story on a long cardstock or use index cards...or memorize it :)
When I first began teaching many years ago, I started making games and activities that could extend math or literacy related experiences for preschool age children.

I decided one day to make a FELT STORY of The Very Hungry Caterpillar. I fondly remember spending a few nights with Colored Felt, Scissors, Hole Punch, TVHC Book, and Glue. The result was quite impressive, colorful and ready to be used by young hands!

Tip: If you have never made a felt story before, they are fun and easy! You can literally make the key characters and objects from a story using all felt OR you can use colored paper or the computer to then attach a bit of felt or velcro on the back and that should work just fine on a flannel board. Or, attach a bit of magnet to use on a magnet board! (and, the floor works just fine with less than four children!)

"by the light of the moon, a little egg lay on a leaf..."

"...the sun...and out popped the little caterpillar..."

"Monday...the very hungry caterpillar at through one apple...still hungry"

"Tuesday, Wednesday, Thursday, Friday...2,3,4,5...still hungry"

"Saturday...uh,oh...tummy ache"
"Sunday one leaf...then so big...then cocoon...then WAIT...then Voila! A Beautiful Butterfly!"


Obviously, I didn't write the full story in the photo boxes, yet  - of course - you should uplift the integrity of the story by doing so when you share with children!

I have found that children take wonderful care of felt pieces and stories when you organize them in a way that sends that message = perhaps a basket, a shoebox or even a zip-bag with a label. Certainly things happen over time - like our dear butterfly has had her antennae snipped a bit - but overall children want to care for and re-create the story! They especially love the "junk food", the strawberries, the very full caterpillar...and The Butterfly!

Cheers to Eric Carle and all his dearly loved books!


the dinosaur that might be dead

It was a surprise - this "dinosaur that might be dead" - a big surprise.
It was a gift on many levels.
The exploration that occurred on this day literally changed my teaching.

"we need to figure out what happened to this skull...!"


It changed how I understood, introduced and valued materials.
It changed how I understood children's engagement with materials as the children seamlessly integrated rich role playing within an exciting scenario that lasted for many days and included many other children.

Also, it became the spin off point for my masters thesis in graduate school (no worries, won't share that whole thing here! :)

Here's the Very True Story of "The Dinosaur That Might Be Dead" :

It was bigger than an Aha! moment that comes along in teaching. I stood frozen for just a few seconds until I realized that this event that was just beginning to unfold in front of me was going to be special. Sometimes you just know. There was energy present among these 4-year-olds that I knew would bring something beyond unique or amusing as they began to engage with the science materials.

Without saying a word, their actions were telling me "Look at this! Look at us! We are teaching you right now. We are giving you a gift." (and they were!).

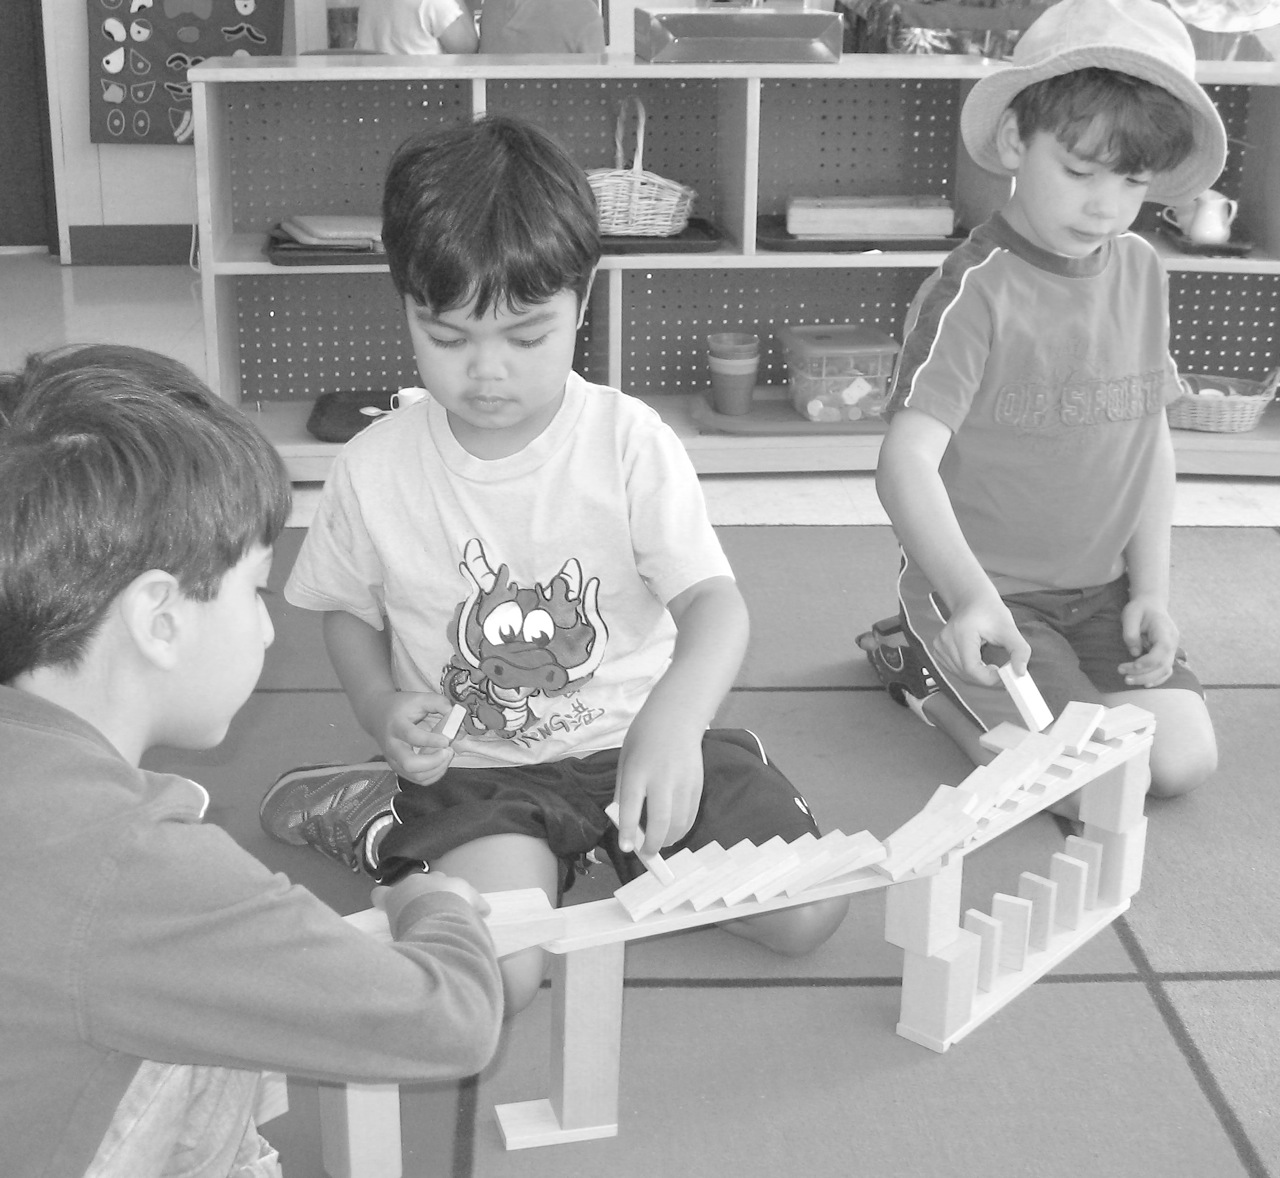
Starting to examine the skull with shells and magnifiers.


In the science area in our 4s/5s classroom, all the exploration tools and equipment are available for the children to use as they wish. 

I usually have introduced the different materials in large group so that children have some sense as to how they might engage with them, yet they can discover new ways on their own.

One particular day, I introduced a deer skull - teeth, bones, cracks and all. I shared with the children how a family had given this skull to our Room 5 classroom many years ago. The family had found it at their grandparents farm as they went on a walk way back behind their barn. They thought we might like to use it to further our then-study of fossils and bones.

I offered to the children, "It seems that bones are pretty interesting for children to investigate. If you would like to plan to work in Science today, perhaps you'll be able to make some new discoveries about the skull."

Three children - Cara, Lucas and Nolan - all planned to work in the Science Area.
"We want to use the deer skull," they each said to me.

The three children took the deer skull to an open table...
then the children turned around and proceeded to take out everything else from the Science shelves, as well, and bring it all to the table. 
They had kaleidoscopes, magnets, shells, pinecones and magnifiers.
"Oh, yes," Lucas says to me, "we need everything so we can figure out what happened to this skull!" Claire and Nolan agreed quickly and spread all their equipment out. I sat nearby to listen to their discussion as the 'examination' of the deer skull began. 


The children used
  • shells to tap into small gaps of the skull.
  • magnifiers for all areas of the skull, especially to examine the cracks which they quickly pronounced as quite important to whatever happened to the skull
  • magnets were slipped into the eye holes
  • kaleidoscopes were used for looking at teeth
While all three children used the equipment in unique ways to examine the skull, the dialogue between the children was lively, creative and quite dramatic.

The children turned themselves into Doctors of various kinds - "I am the Doctor Wizard,", "I am the Doctor Princess" and "I am the Doctor of Bones." 

The children agreed that they were not dealing with just a deer skull, but actually
 A DINOSAUR THAT MIGHT BE DEAD!

More friends examine the "dinosaur that might be dead" with kaleidoscopes, magnifiers, water/oil blocks, and shells


Cara: We are going to make him back alive!
Lucas: I am checking the eye and the nose...
C: It is getting worse!
Nolan:  I think we should check his head! There might be a rock in there or something!
C: His brain is not thinking - that is wrong!

N: It is getting worse!
C, N, L: We must check his eyes and his nose again!
N: There is an infection on his horns!
C: We have to wash his eyes to make him alive! Or he might have to stay in heaven forever...
L: I think he needs some medicine!
C: We have to help him die, that is the only way!

N: We need kaleidoscopes to help him!
L: Yes!
N: Uh-oh, he is getting power in his nose, there must be a lizard nearby! Maybe he swallowed a snake or a lizard!
N: Come on, we got to do this fast, no time to talk, he is getting worse fast!

C: He is going to die!
L: Inside is really bloody now...
N: Uh-oh, he is cracking more...
L: I need to wash his teeth...
N: Yes, that will take away the cracks.

C: No, no, no, something else was happening. I think the snake killed him with his teeth...
N: ...with his tongue!
C: He has killers in his teeth, that means he is really dangerous!
N: Like a boa constrictor!
L: No, a rattle snake, no a rattle scorpion, or a dinosaur!
N: It was a rattle snake because they are dangerous, very dangerous. They live in the desert. This is very serious. Hey, both the scorpion and the snake live in the desert, maybe they both killed him...!
N: This is a big discussion we are having!
L: We need to kill him or else he will kill the whole world!
N: This is serious, way serious. Maybe he got shot by an arrow, or maybe he got burned by fire...

Testing and examining continues with shells inserted through holes and cracks of the "dinosaur that might be dead."

The dialogue was rich with theories about life and death. There was diverse tool use, inventive role play, and engagement with peers.
There was depth of interest in the investigation and quick, open thinking to participate in this conversation together.

Light Bulb: This experience with Cara, Lucas and Nolan is more than creativity, more than role playing, more than exploring with materials. What this experience brought to light for me was that the materials that are seemingly separate on science shelves are actually not separate at all. The children were driven by an inquiry about this skull that opened up the possibilities of how to use materials. In turn, I found that the children were driven to come back to Science to follow up their own work with the dinosaur from previous days.
Aha!: It was the first time that such a complex scenario was invented in an area of the classroom that is not known for role play to be meshed with inquiry.

For a combination of reasons on this day The Dinosaur That Might Be Dead the children looked at the materials in a new way. Cara, Lucas and Nolan didn't give a second thought to having all the equipment all over the table.
After all, you never know what you may need to bring a dinosaur back to life:  "Come on we got to do this fast, no time to talk, he is getting worse fast!"

parachute juggling

(This looks just too happy not to share...)
"Hold on...lean down with your edge...1 -2 -3...explode UP!!"

a team of 16 four-year-olds and one teacher were able to make this gorgeous shot happen!


1. YOU can do mini-parachutes using scarves or blankets or beach towels! You can find light weight objects to "explode" together - ping pong balls, little stuffed animals, hats, sponges...you get the idea! 

2. IF you have a few extra people, you could use an old flat bed sheet...
and IF you have a few EXTRA EXTRA people, you could use TWO bed sheets for two teams and try to toss objects from one sheet to the other - Parachute Volleyball game :) (** water balloons are pretty fun to use for this game!!)

3. IF you really do have a parachute - or great big sheet -  you can do some SCRAMBLING UNDER the parachute when it is up in the air and try to get to the opposite side of the 'chute!

a boy in mid-scramble to get to the other side of the parachute!!


Have a
wonderful, outdoors,
laughter-filled weekend.

be that teacher

What IF... children could DO what they wanted with whatever materials they chose?
What IF...children could THINK of an idea then try it out with whatever materials they chose?
What IF... children could INVENT anything they wanted with whatever materials they chose?

Mix mix mix all the colors on the palette...creating just the color she wants, needs, wants, needs.

What IF...teachers loved teaching BECAUSE the children invented and thought and created in their own ways? 
What IF?
Make it happen.
Be that teacher.
The joy is endless. The joy is endless. The joy is endless.

Bugs, bears, GEO boards upside-down, dominoes, 1-10 blocks, pattern rods designed exactly just so by 2 children.
KAPLA wood blocks in star shapes 1,2,3,4,5,6,7,8 and working on #9...
Bears, red and yellow counters, rods, and geometric shaped pieces to work together to cover this flannel board!
Using a ruler and black pen to make lines over a large water colored art piece.
Magna tiles, cardboard tunnels, cube blocks, cones and one traffic orange-white striped cone on top!

THINK ABOUT the amazing creations that would not have been created if children needed (needed?) to do things like adults expect traditionally?
   
   What kind of learning environment is that?
   What kind of day is that for the child AND the teacher?

I have always wanted to have a joyful, surprising, wonderful day at school...just like children want.
Be that teacher. 
Make it happen for the children and for yourself.

This block structure is NO ACCIDENT - different sized rectangles and slanted ramp blocks to exactly create this.
Magnet balls inside of shells lined up in a lovely curvy line with one closed at the end.
Hat created with tape and specially cut papers, then curved and attached just so, with bits flaring out the side.
Using their marble ramp design skills to use variety of recycled wood balls to roll simultaneously.

"There is a big difference between
having many choices
and making a choice." 
(bender)

Skills in CHOICE MAKING:
  • sense of self as meaning maker
  • creativity
  • small motor
  • hand-eye coordination
  • opinions and knowledge about colors, sizes, quantities (qualities & attributes)
  • design ideas
  • self help skills
  • problem solving
  • determining what I do need or want vs. what I don't need or want
  • surprise and joy in the exploration

domino highway

Gotta love dominoes of any kind. Once you start playing, it is sort of addictive!
Try different kinds of BLOCKS, or CEREAL BOXES, or rectangular SPONGES, or LEGOs or actual DOMINOES: line them up - or design in a swirl or make a race with friends - then give them a little PUSH...
These boys took the challenge to new heights.
I had never seen children put dominoes up on a second level like this.
The boys worked together, steady hands, and repeated their attempts again and again (just like we all do when getting a focus for a game of dominoes!).

"I'll work from this end, you work from that end..."
"I think that domino in the middle started by itself!"

"Here we go! We used dominoes in our hands to give the PUSH and the whole top of the highway went down!" Please note that none of the pieces even fell off the highway! wow!
Great for:
  • small motor
  • hand-eye coordination
  • space planning
  • problem solving
  • creative design
  • cause & effect (IF I push this, THEN these will fall over...)
  • indoors or outside
  • done alone, with partner or in a group
  • varied complexity depending on age, interest,  & objects used
Read for a game of Dominoes?
Have fun, be patient, and see how far your domino highway 
- or ground level road - 
can travel!